A rain barrel overflow pipe installation

This summer I finally installed an overflow pipe on the rain barrel. I'd been quite curious about how exactly this works (in particular, how the seal works), so I'm documenting it here.

This is a barrel we were gifted by a neighbor, and while it works pretty well to collect rain, it has several problems that are inherent with right-side-up top-hole barrels: Standing water on top, sedimentation, mosquito problems (or mosquito filters that clog up), and most importantly no provision for what happens when it fills up. (BlueBarrel Systems has a clever upside-down, bottom-filling system that eliminates all of these problems, but this is the barrel I have to work with at the moment!)

This barrel only has a capacity of 55 gallons or so, and a good long rainstorm (or a short one if we haven't used up much water recently) can quickly fill the barrel. When it fills up, the water just sluices down the sides and ends up back next to the foundation -- where it will erode the dirt, seep into the foundation, and undercut a nearby walkway. It even undercuts the foundation I made for the barrel.

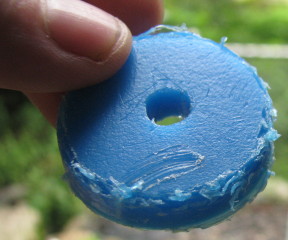
The solution is to install an overflow pipe. I ended up getting the Rain Reserve barrel connector kit. (This kit is intended either for connecting to another barrel or for hooking up to a diverter in a downspout, but it works for this too.) It had all the necessary parts, just requiring tools.

I bought the needed 1.5" hole saw at the hardware store, but when I went to use it I discovered it was too big for the power drill's chuck. Well, it's just plastic, so I drilled it in by hand. It took a good five or ten minutes, but it was faster than any other solution. 🤷 I did end up with a blister, though.

Photo of a circular chunk of blue plastic being held up
         in the foreground, about 35 mm across and 6 mm thick. In the
         background is the rain barrel.

Next I cleaned up the hole with my pocket knife and inserted the FNPT barrel seal, a short black rubber cylinder with internal threading that I pushed into the hole with some difficulty. The outer diameter is wider on both ends and smaller in the middle so that it won't fall in or out. There's a triangular tab sticking perpendicularly out of one end.

Photo of the FNPT barrel seal, held in my hand

The hose adapter is a white plastic tube with external threading on one end and a short hexagonal segment in the middle. The other end is left smooth so the overflow pipe just slides onto it.

Photo of the hose adapter, held in my hand

I put a few wraps of the provided PTFE sealing tape on the hose adapter and screwed it into the barrel seal. The barrel seal is internally threaded and I believe it tapers narrower towards the inside of the barrel, so that the adapter will force it wider against the drilled hole. I had some difficulty getting the adapter to screw straight in; the barrel seal's threading isn't "open" at the end, instead having a slim piece of rubber covering the place the thread cut starts, so I kept getting things crossthreaded. Once it was straight, I screwed it in as far as I could by hand. The instructions say to avoid using a wrench unless it leaks. The triangular tab on the barrel seal allows you to grip it with pliers to provide counter-rotation when tightening, although I didn't need it. (I had noticed this in photos of rain barrels but couldn't figure out what it was for, previously.)

Photo of the white plastic hose adapter and black rubber
         barrel seal installed in the barrel, with the blue rain
         barrel filling most of the rest of the frame. One segment of
         the adapter is hexagonal.

Then I was able to connect the flexible 1" tubing to the adapter and snake it along the ground in a place where it wouldn't get stepped on. In the photo I have it dumping into a short piece of PVC to get it a tiny bit farther from the house.

A few minutes later, it started to rain, and I was able to test out the new pipe.

Photo of the rain barrel with overflow pipe in
         place. The tube comes out of the barrel just an inch or two
         below the rim, descends to the ground, and then travels along
         an undercut asphalt ledge to a rocky area.

I later got a 24 foot drainage pipe off of Freecycle to extend it to where I wanted it (a natural depression in our neighbor's yard). I moved the PVC to encase the most vulnerable part of the tubing to keep it from getting crushed by bikes and feet.

Photo of the overflow pipe from the other side of the barrel; the white corrugated overflow pipe provided by the kit enters a 3 foot long PVC pipe and a black corrugated plastic pipe exits the other end. The PVC pipe is positioned where people would step up or down from a concrete ledge.

I'm pretty pleased with how this turned out. Despite this installation being fundamentally flawed in several ways, it gives us plenty of water for the garden and buffers and diverts rainwater away from the foundation. The anti-mosquito screen still clogs up somewhat and in particularly intense rains the barrel will still overflow over the rim because of that, but the majority of the water will still be handled as desired.

That said, while this kit was appropriate for the situation at hand, this isn't the approach I want to use in general. I'd like to work with the landlord to set up a more extensive system of barrels using the BlueBarrel approach, which leaves the barrels almost entirely intact and allows for more modular designs.

One thing I'd like to explore in particular is connecting an overflow pipe to an additional barrel that in turn feeds a drip irrigation line. The soil can only buffer so much water, and here in the city anything we divert away from the house is towards someone else's, and I'd like to avoid making it Someone Else's Problem. If I can buffer the water and slowly release it, perhaps that will reduce the water surge elsewhere. This will become more important in the future as New England's climate tends towards more sporadic but more intense rainstorms. I'd be curious to hear if anyone has seen such a system designed and built—I'm not exactly sure how I'd want to balance the capacities of water-to-keep and water-to-release, and how to make it adjustable so that we could change it as our water usage changes.

No comments yet. Feed icon

Self-service commenting is not yet reimplemented after the Wordpress migration, sorry! For now, you can respond by email; please indicate whether you're OK with having your response posted publicly (and if so, under what name).